
Well tonight my plans to see some friends (one of which recently had a baby we haven’t met yet) got cancelled so I thought I could use my extra time to do some housework or to do an extra blog….and here I am!! There’s always ‘later’ for housework ; ) !
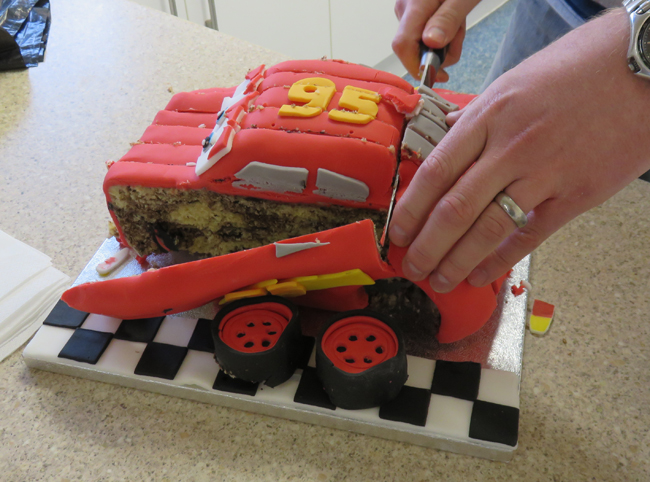
So catching up on this years cakes, my next order for January ’15 was another challenge… My friends Lowri and Neil asked for a Cars Lightning McQueen cake for their son Joseph’s 2nd birthday, and Neil asked if was up for the challenge of making the whole cake in a car shape! I did a little research and decided to give it a go! As I needed to carve it, I found a Madeira cake recipe which would be firmer for carving, and added a swirl of melted chocolate into it to add to the flavour! I baked two 10″ square cakes, which were each cut in to three layers. Before beginning baking, I spent quite a while planning and had made lots of templates and prepared a special board for the cake to go on, to sit raised above the normal cake board. This board was cut into the shape of the car, which gaps for the four wheels, and it was raised higher at the front and back. This allowed the car to sit above the board with just the wheels on the board, and added to the shape of the car. So once the board was ready, I carved each layer of cake individually using my template, and placed them on the board one by one with layers of vanilla buttercream in between. I was then able to carve in the shape of the bonnet, windscreen and boot, and cut out space for the wheels. I then covered it all in buttercream and left it overnight in the fridge. The following day I took it from the fridge, and while it was still cool I tried a new technique to smooth it – by taking kitchen roll and gently rubbing all the sides to smooth out any bumps. This seemed to help a little, but I suspect I should have used a thicker layer of buttercream to get a perfectly smooth finish.
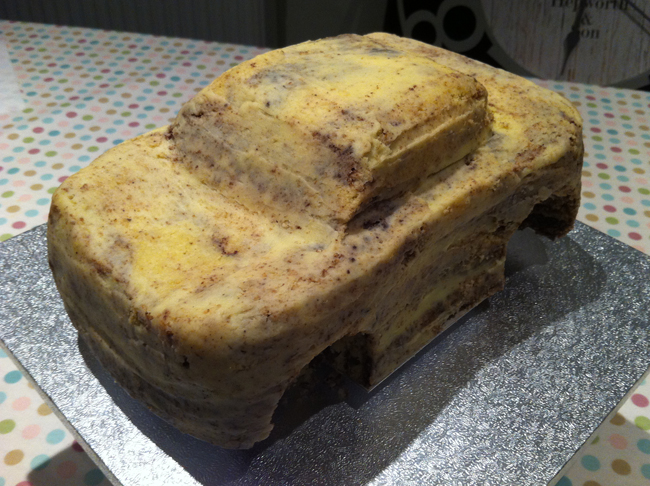
The carved car shape
The cake was then ready to cover in fondant! Before adding the red fondant, I laid on a thin layer of white, with black pieces at each end in the space his mouth would be in, which I then covered with a piece of greaseproof paper…. Once the whole cake was covered in red fondant I was able to cut over the white and black fondant to reveal his smile!! The greaseproof paper could be pulled away to reveal a nice white smile which was protected from any risk of red colour from the top layer of fondant.
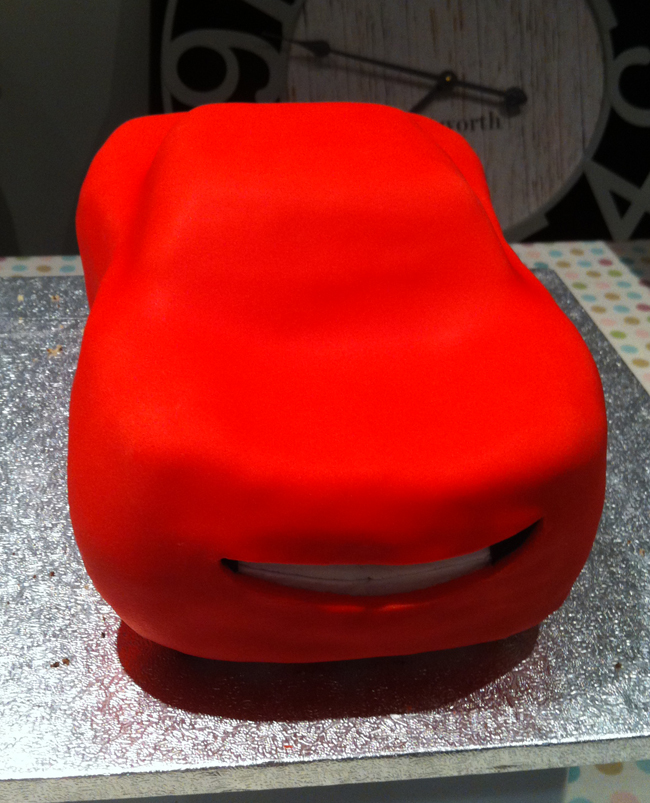
After covering with red fondant, and revealing his smile!
Next, I worked I on his wheels. For these I used Oreo cookies, covered with red and black fondant. Once I had added these I felt more confident that it was going to look like a car, and felt really pleased with the shape and the overall appearance at this point.
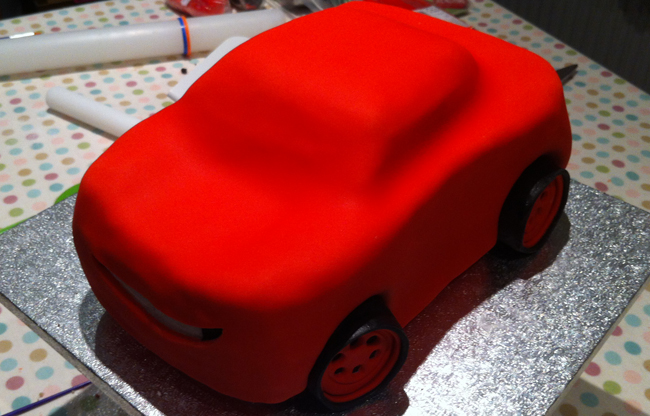
Beginning to take shape after adding the wheels…
All that was left now was the final decorative details… I used my templates to cut grey fondant for the windows, the lightning for the sides, and a large number 95 for the roof and smaller ones for the sides. I added lights on the back and front, and made his blue eyes for the front. I wanted his eyes to be more interesting that just blobs of blue fondant, so I cut white fondant circles and painted them with blue petal dust dissolved in vodka! I liked the effect this gave, and once this was dry I added the black and white fondant to complete his eyes.
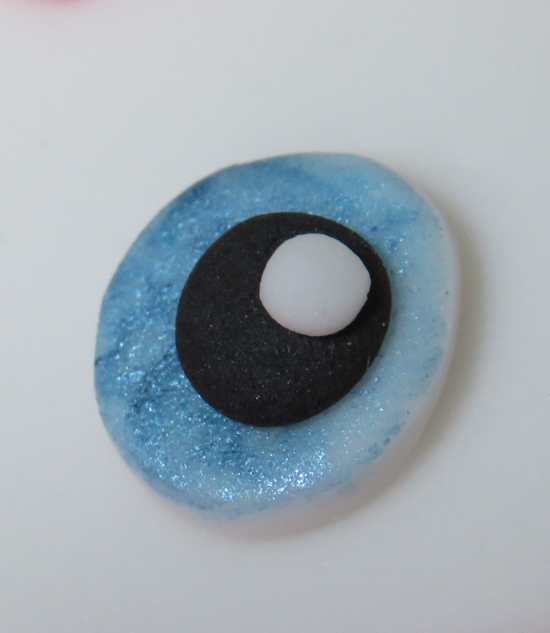
His ‘painted’ eyes
So after many late evenings of work, the cake was finished and I was pleased with the result! I had tried a lot of new techniques with this cake, and felt that each idea was worth all the effort!!

“Ka-chow!”
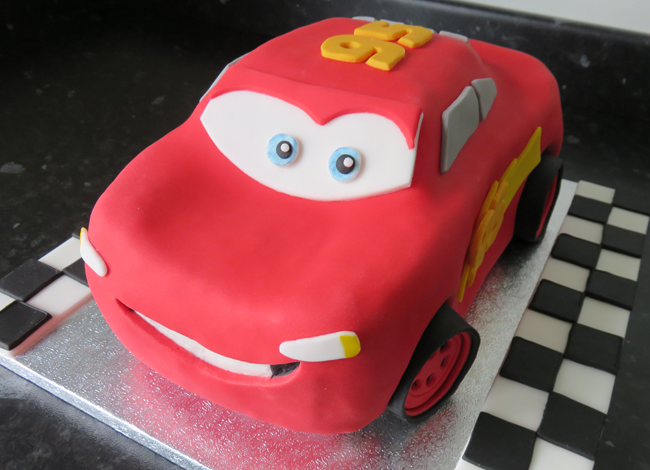
The finished Lightning McQueen
Joseph seemed pleased with it, and particularly enjoyed the cookie wheels!!

Joseph enjoying his cake!
I was also relived that easily fed all the people at the party, and there was still plenty for the family to enjoy at home 
I had no need to worry the cake would feed enough people!
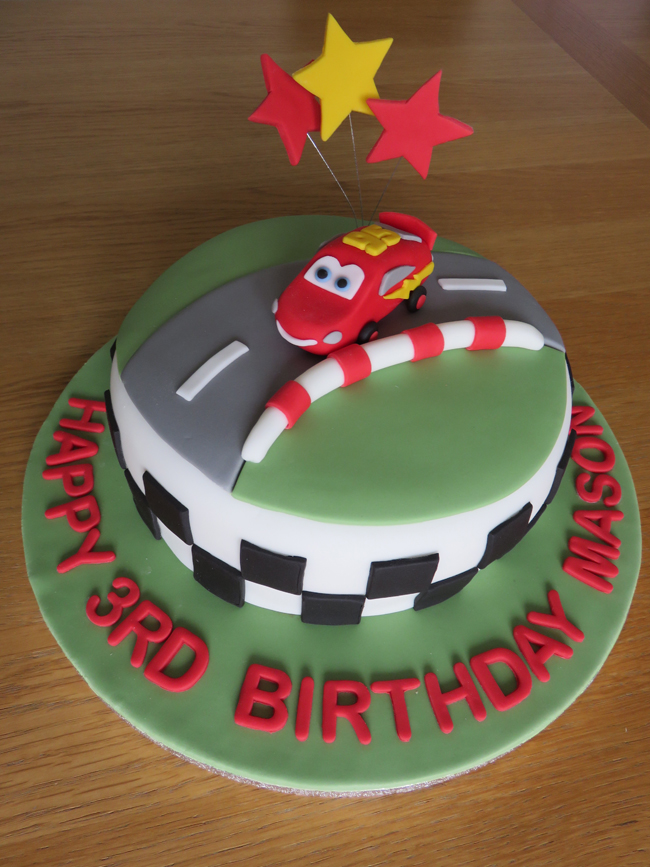
I made a second Lightning McQueen cake in February, for Justyna. This cake was for her nephew’s 3rd birthday, and the order was for a chocolate sponge to feed 22 people, and Justyna sent me a few pictures of things she liked. We agreed on a cake made of three sponge layers to feed the required number of people, and I tried to incorporate in all the decorating aspects Justyna had seen and liked. I decorated the top of the cake with green grass and a grey road, and made a small fondant Lightning McQueen to sit on the road. Making him on this small scale was quite difficult, and adding the details was tricky and time consuming, but I was pleased after a few attempts! I was also asked to add three wired stars behind him, so I had to make these in advance to dry, as well as a base for the car to go on, as I wanted to add some dowels underneath to make sure the weight of the fondant didn’t sink it into the cake.
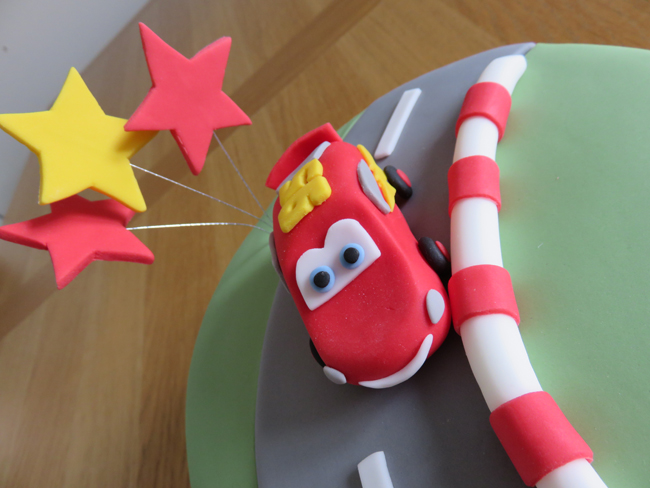
Lightning McQueen on the race track
The sides were covered with white and black chequers, which created a great effect. I covered the board in green and added red lettering with the birthday boy’s name, and the cake was ready to go!
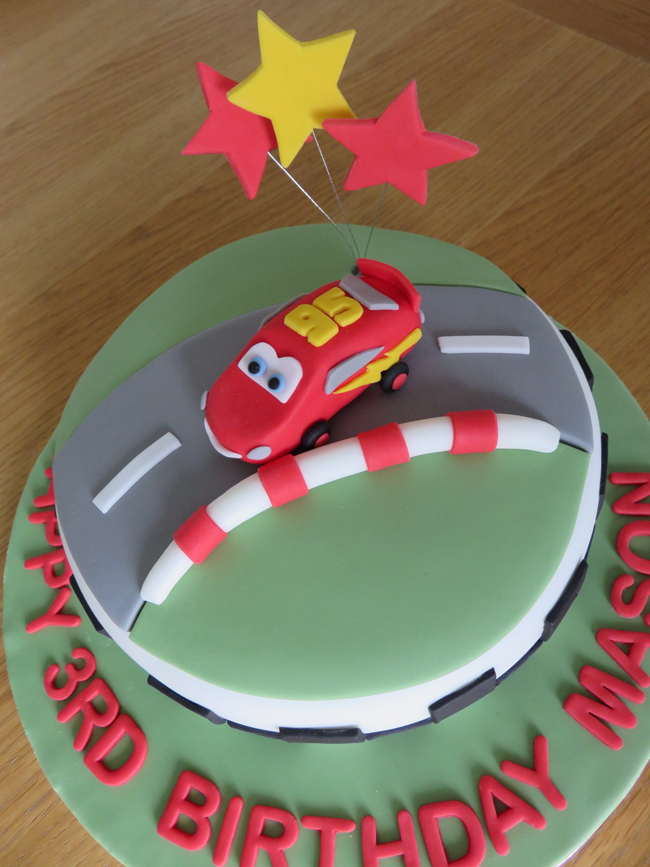
Mason’s Cars cake
The Cars cake